

When your organization adds you to HiThrive, you'll receive an email invitation walking you through a short setup process. The whole flow takes just a few minutes.
Step 1: Accept your invitation
You'll receive an email from no-reply@hithrive.com with the subject line "You've been invited to HiThrive!" It will include a welcome message from your organization and a link to get started.
Click Activate account to begin.
💡 Don't see the email? Check your spam or junk folder. If your organization uses email filtering, ask your IT team to allowlist no-reply@hithrive.com.Step 2: Accept the invite
Clicking the activation link opens HiThrive in your browser. You'll land on a welcome screen confirming you've been invited to join your team.
Click Accept invite to continue.
Step 3: Set up your profile
On the Welcome step, you'll be prompted to create a password for your account.
Your password must meet the following requirements:
At least 6 characters
Includes an uppercase letter
Includes a lowercase letter
Includes a number
Includes a symbol or special character
Enter your password, confirm it in the second field, and click Next.
Step 4: Set your celebration preferences
On the Privacy step, you'll choose how you'd like your birthday and work milestone celebrations to be handled.
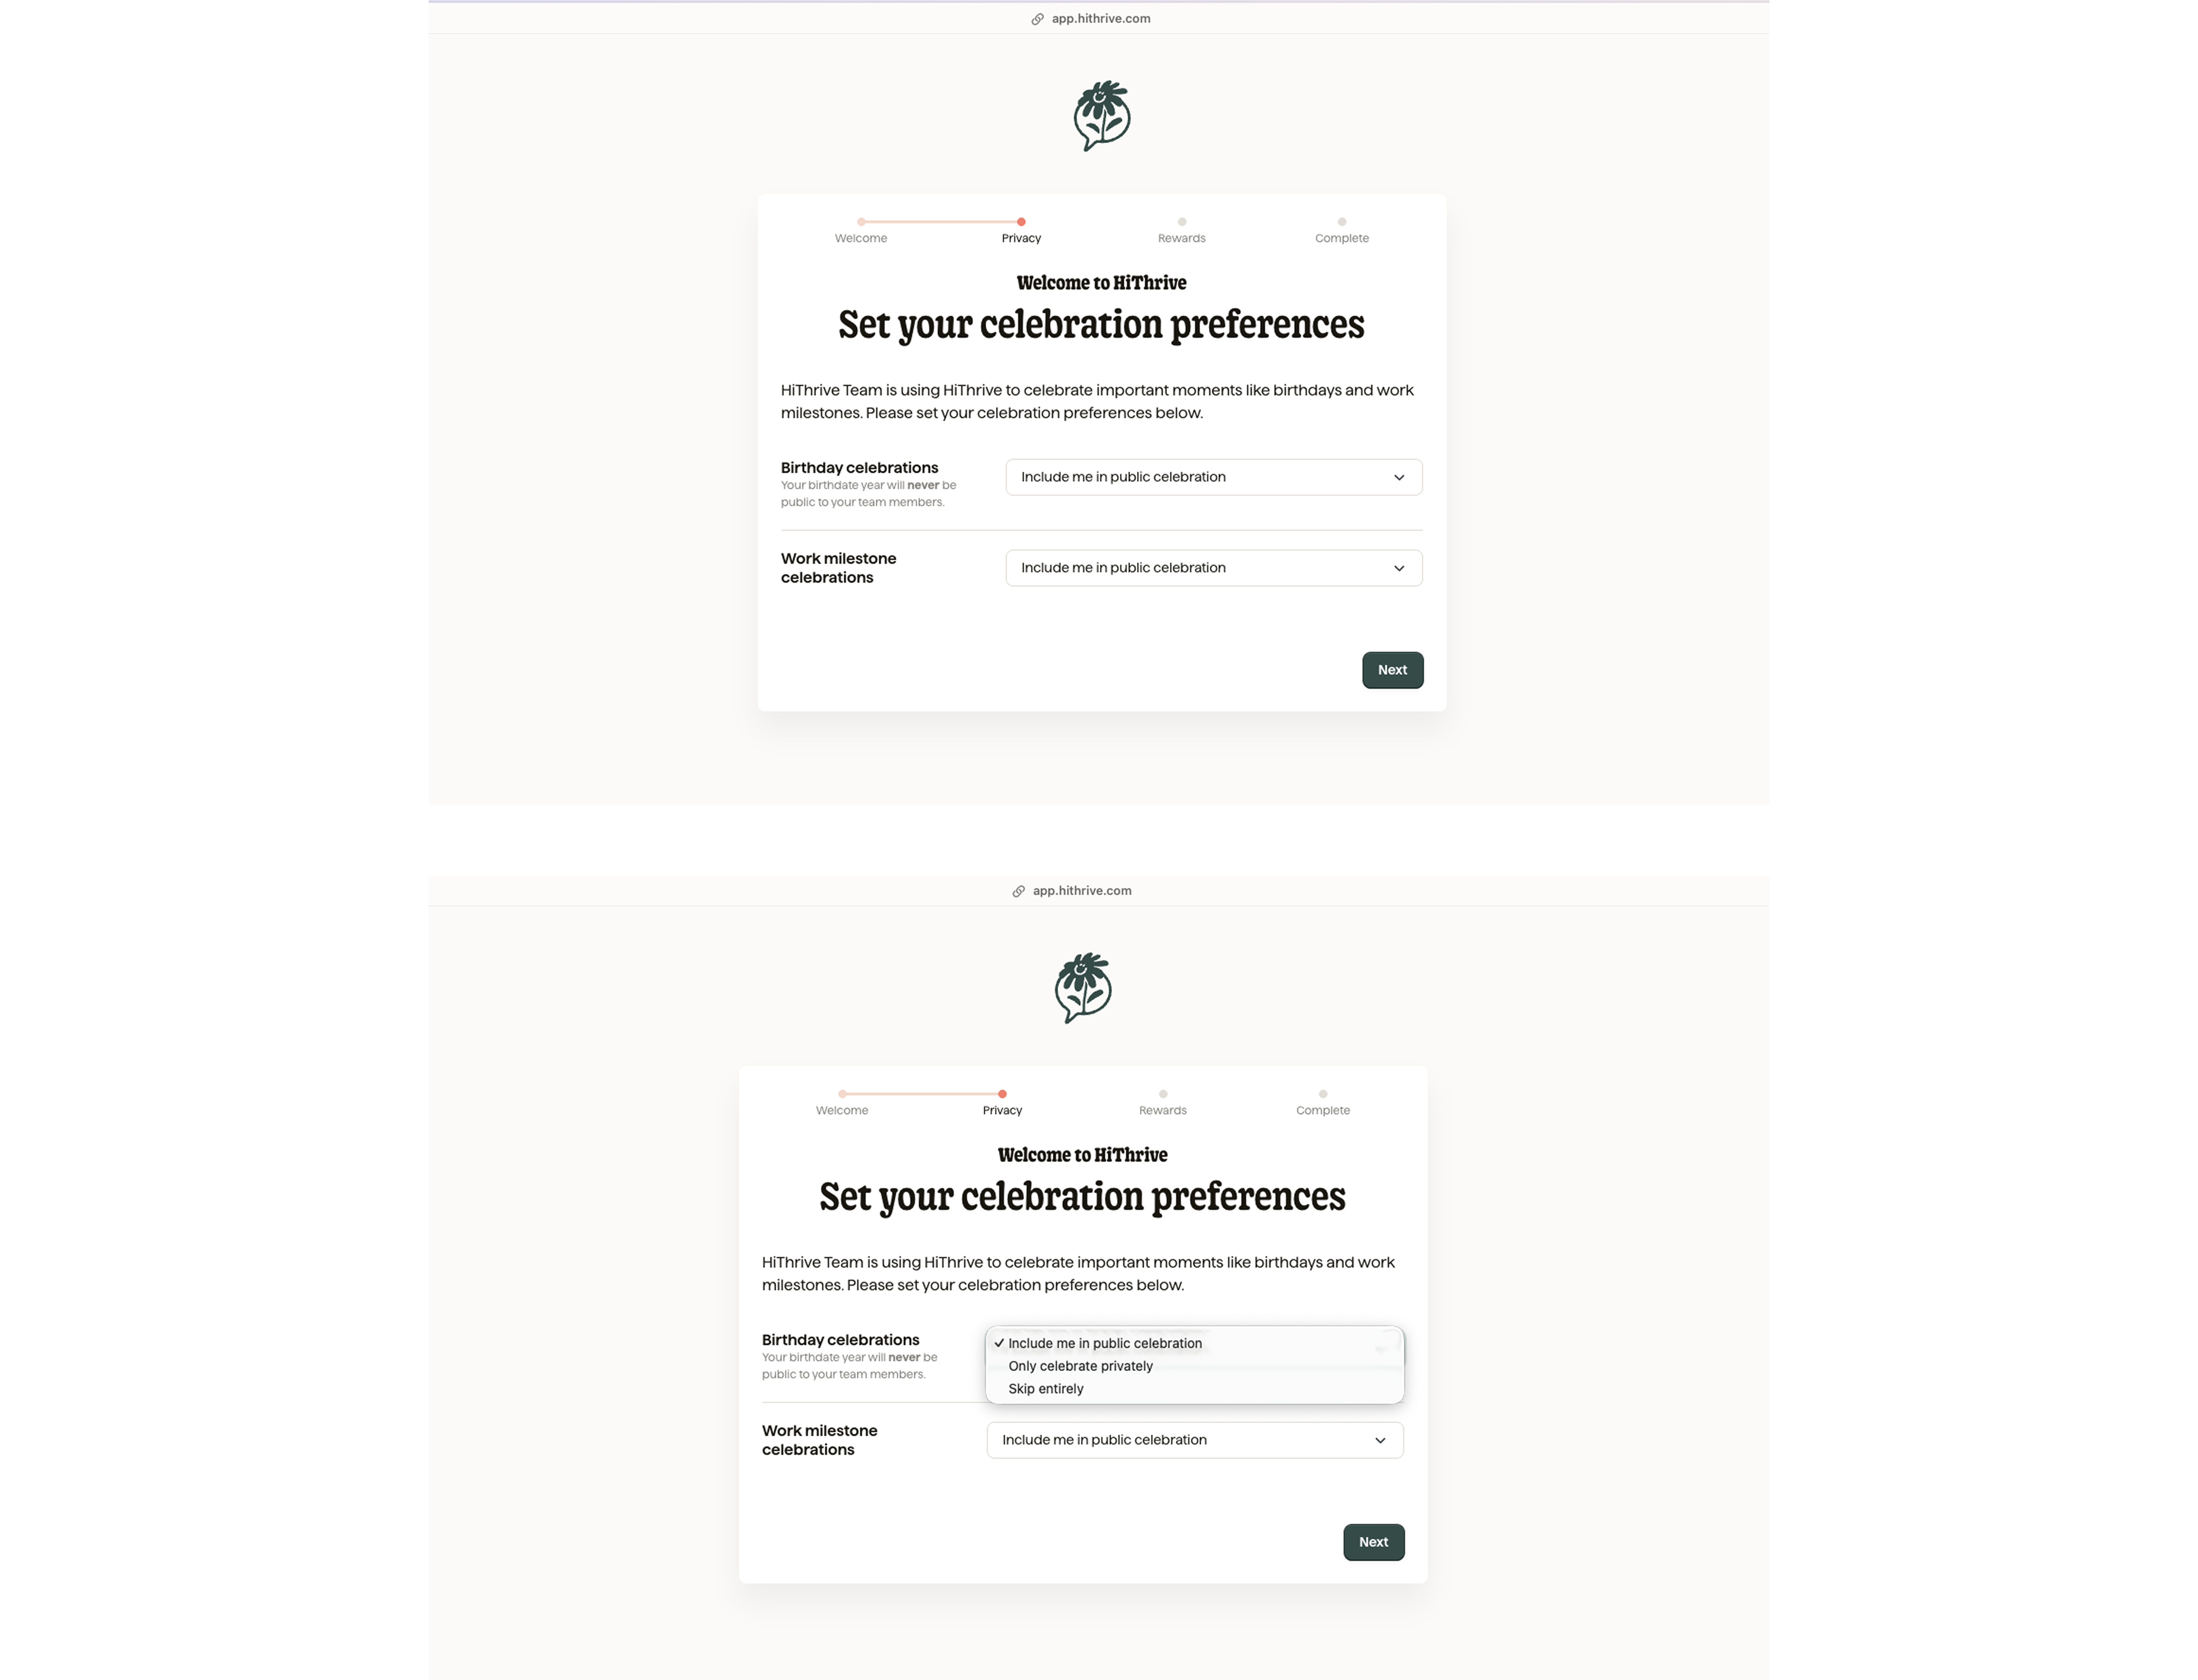
For each celebration type, you can select one of the following:
Option | What it means |
|---|---|
Include me in public celebration | Your celebration is shared with your team |
Only celebrate privately | You receive a private message, not a public post |
Skip entirely | No celebration is sent |
💡 Your birth year is never shared with your team members. Only the month and day are used for birthday celebrations.
Click Next when done.
Step 5: Choose your country
On the Rewards step, you'll select your country. This determines which rewards are available to you in the catalog.
Search for or scroll to your country and click Next.
Step 6: You're in
Once you complete the setup steps, your account is active and you'll be taken into HiThrive. From here you can send shoutouts, view your points balance, and explore the rewards catalog.
⚠️ If you run into any issues during setup, click Need help? at the bottom of any setup screen or reach out to your HiThrive administrator.