We're here to help!
Search our help guides or reach out to our support team.
Integrations: Set up SCIM with Microsoft Entra AD (fka Microsoft Azure AD)
Integrations
Integrations: Set up SCIM with Microsoft Entra AD (fka Microsoft Azure AD)
Set up SCIM provisioning with Microsoft Entra ID
Updated 1 week ago
Your AD integration with HiThrive allows you to automatically configure AD to send user profile updates to HiThrive using SCIM.
The supported features include:
Create Users: When a user is created or activated in AD, they will automatically be created or reactivated in HiThrive.
Update User Attributes: When a user attribute is changed in AD, the corresponding user profile in HiThrive will automatically be updated.
Deactivate Users: When a user is deactivated or disabled in AD, the corresponding user in HiThrive will automatically be deactivated.
Before you start
As this is a custom integration, there are limitations such as some fields will not be synced or that we will need extra steps in order to create a connection:
HiThrive's SCIM API does not yet support SCIM Groups, SCIM Bulk Updates, Azure patch or filter options in attribute mapping.
In order to map the manager field, follow these steps.
Some default attributes contain filters and will need to be removed.
Learn more about known issues for application provisioning in Azure Active Directory
Create a Custom Enterprise Application in AD
In Azure portal, go to Azure Active Directory.
On the left panel, go to Enterprise applications > All applications > click New application.
Click + Create your own application.
Enter the name of your app (i.e. HiThrive SCIM).
Under What are you looking to do with your application, select Integrate any other application you don't find in the gallery (Non-gallery).
Select Create.
Under Getting Started, follow step 1. Assign users and groups
Enable provisioning for the custom HiThrive SCIM application
Once user and group records have been assigned to the custom HiThrive SCIM application, you can proceed to provision user accounts.
While still on your custom HiThrive application page, navigate to Provisioning > click Get started.
Click on the Provisioning Mode dropdown and select the desired option.
Automatic (recommended): User and group entities are pushed to HiThrive every 45 minutes
Enter the following HiThrive SCIM API details:
Navigate to HiThrive Admin Portal – SSO
Copy SCIM Provisioning Endpoint URL
Copy Secret SCIM Token
Select Test Connection to ensure the credentials are authorized to enable provisioning.
After receiving a successful test, select Save.
Configure additional Mappings and provisioning Settings.
Azure SCIM: Mapping user attributes
Note: HiThrive's Azure SCIM integration does not currently support group mapping
Navigate back into your custom HiThrive App > go to Provisioning.
Under Manage Provisioning, click Edit attribute mappings.
Expand Mappings, depending on how you set up your users in the custom HiThrive app, click Provision Azure Active Directory Users to bring you to the Attribute Mapping page:
Complete the following options:
Enable/Disable the source object mapping
Under Source Object Scope, set the scoping filters for the object record queries that will be initiated for each provisioning cycle.
Under Target Object Actions, select the target object actions in scope for each provisioning cycle (Create/Update/Delete).
Under Attribute Mappings, define how attributes are synchronized between Azure AD and the HiThrive SCIM app.
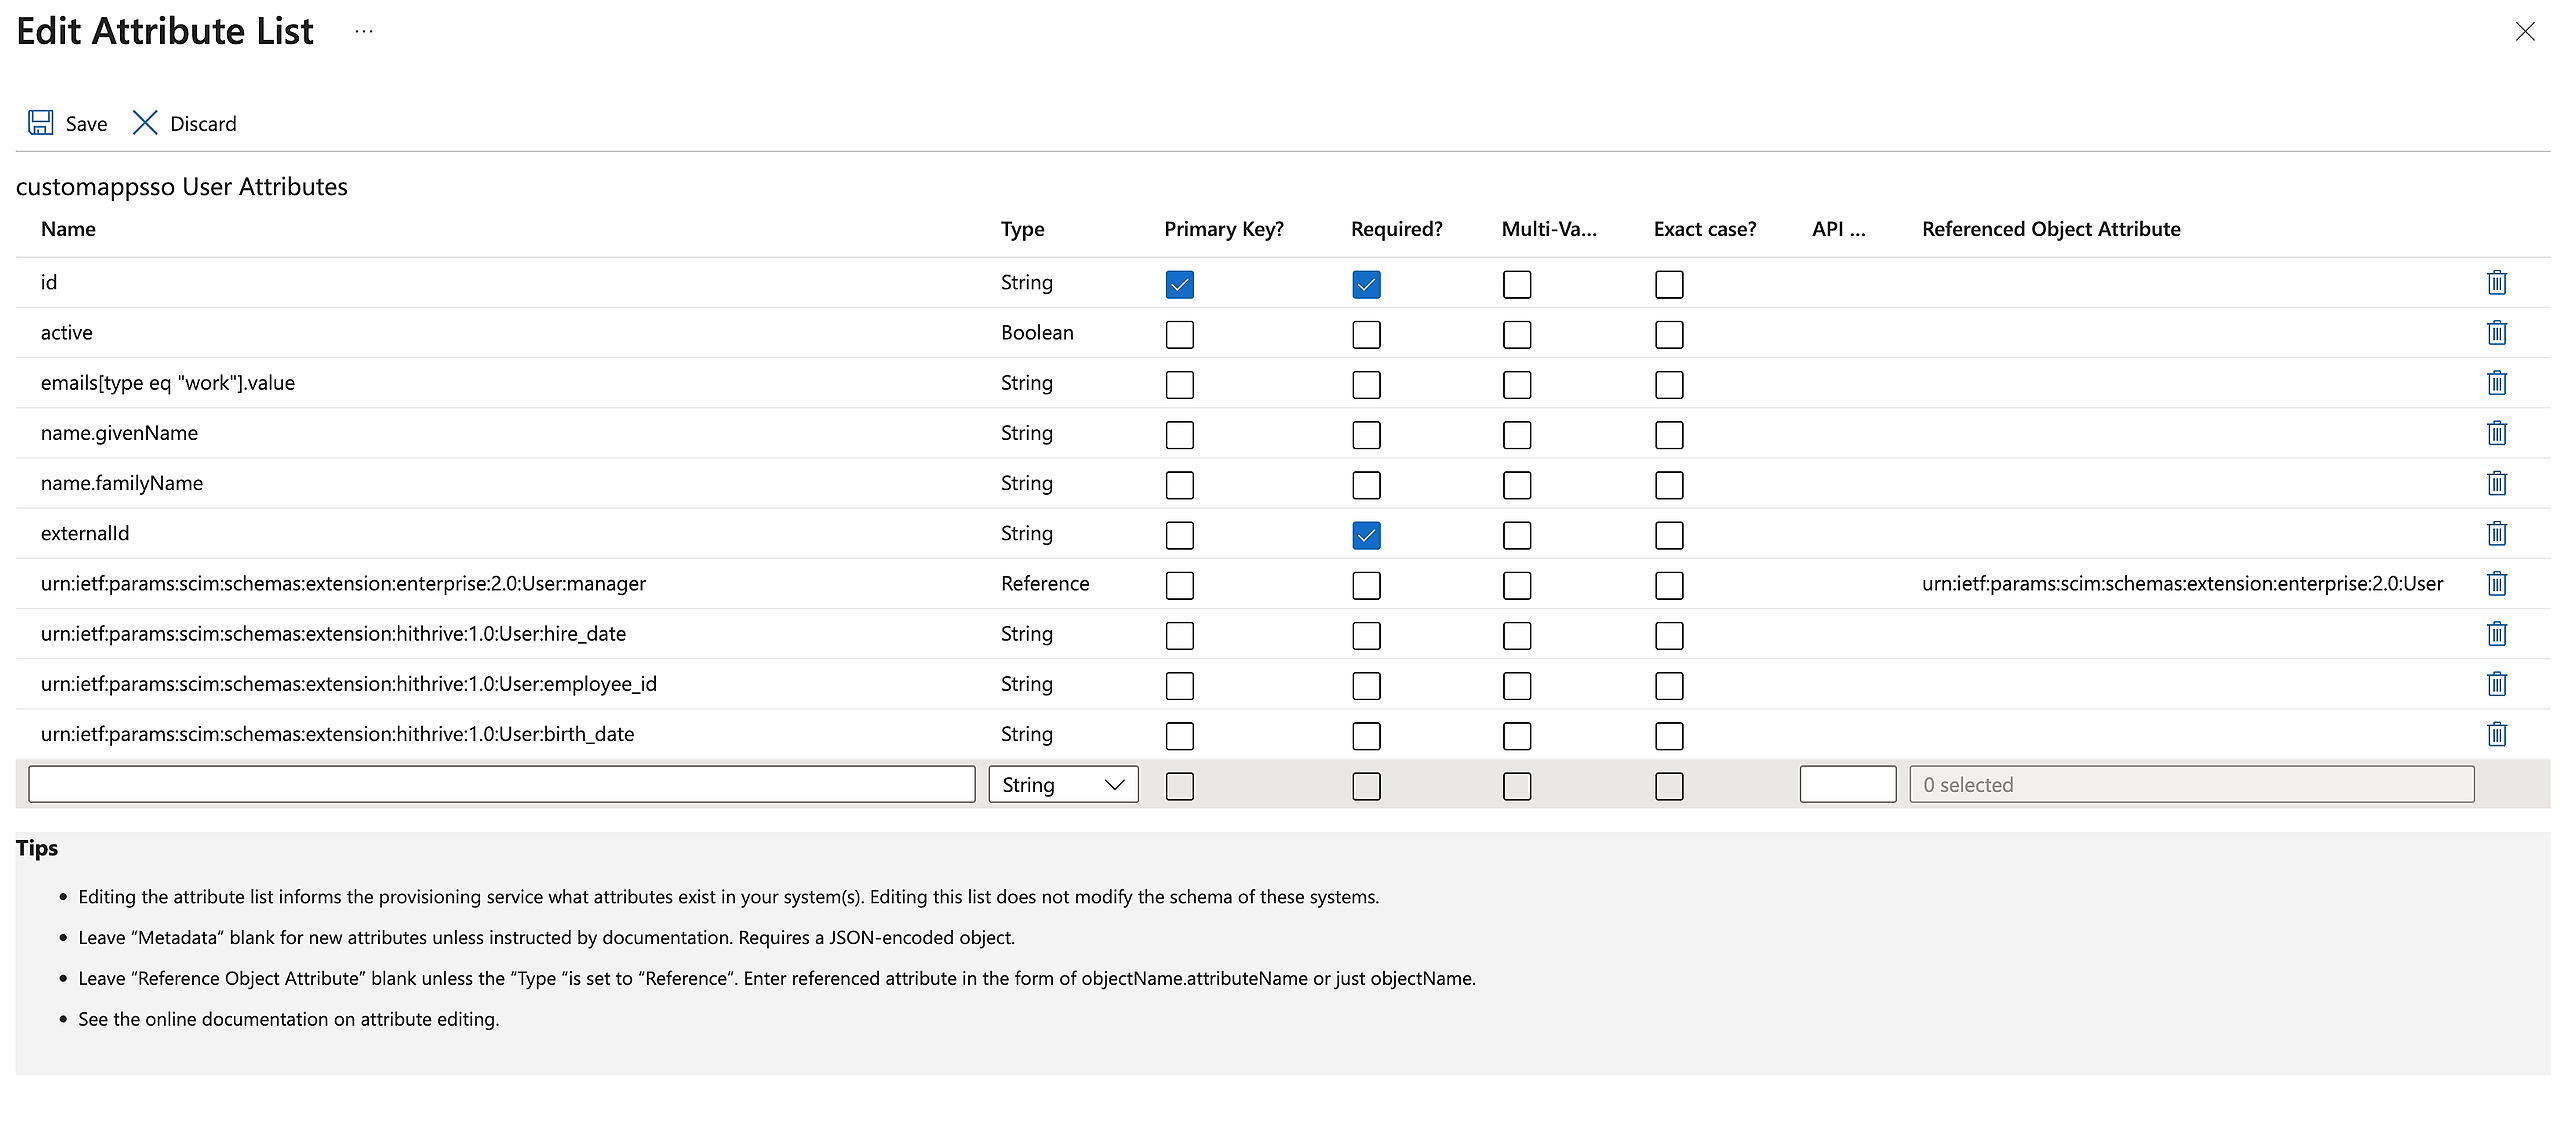
To ensure the Attribute Mappings are aligned to HiThrive attributes, the following fields need to be from the mapped:
customappsso Attribute
Microsoft Entra ID Attribute
Matching precedence
externalId
objectId
1
active
Switch([IsSoftDeleted], , "False", "True", "True", "False")
emails[type eq “work”].value
mail
name.givenName
givenName
name.familyName
surname
urn:ietf:params:scim:schemas:extension:enterprise:2.0:User:manager
manager
urn:ietf:params:scim:schemas:extension:hithrive:1.0:User:hire_date
employeeHireDate (MUST BE IN YYYY-MM-DD FORMAT)
urn:ietf:params:scim:schemas:extension:hithrive:1.0:User:birth_date
Must be in YYYY-MM-DD format
urn:ietf:params:scim:schemas:extension:hithrive:1.0:User:employee_id
employeeId
Your attribute mapping should look like the below:
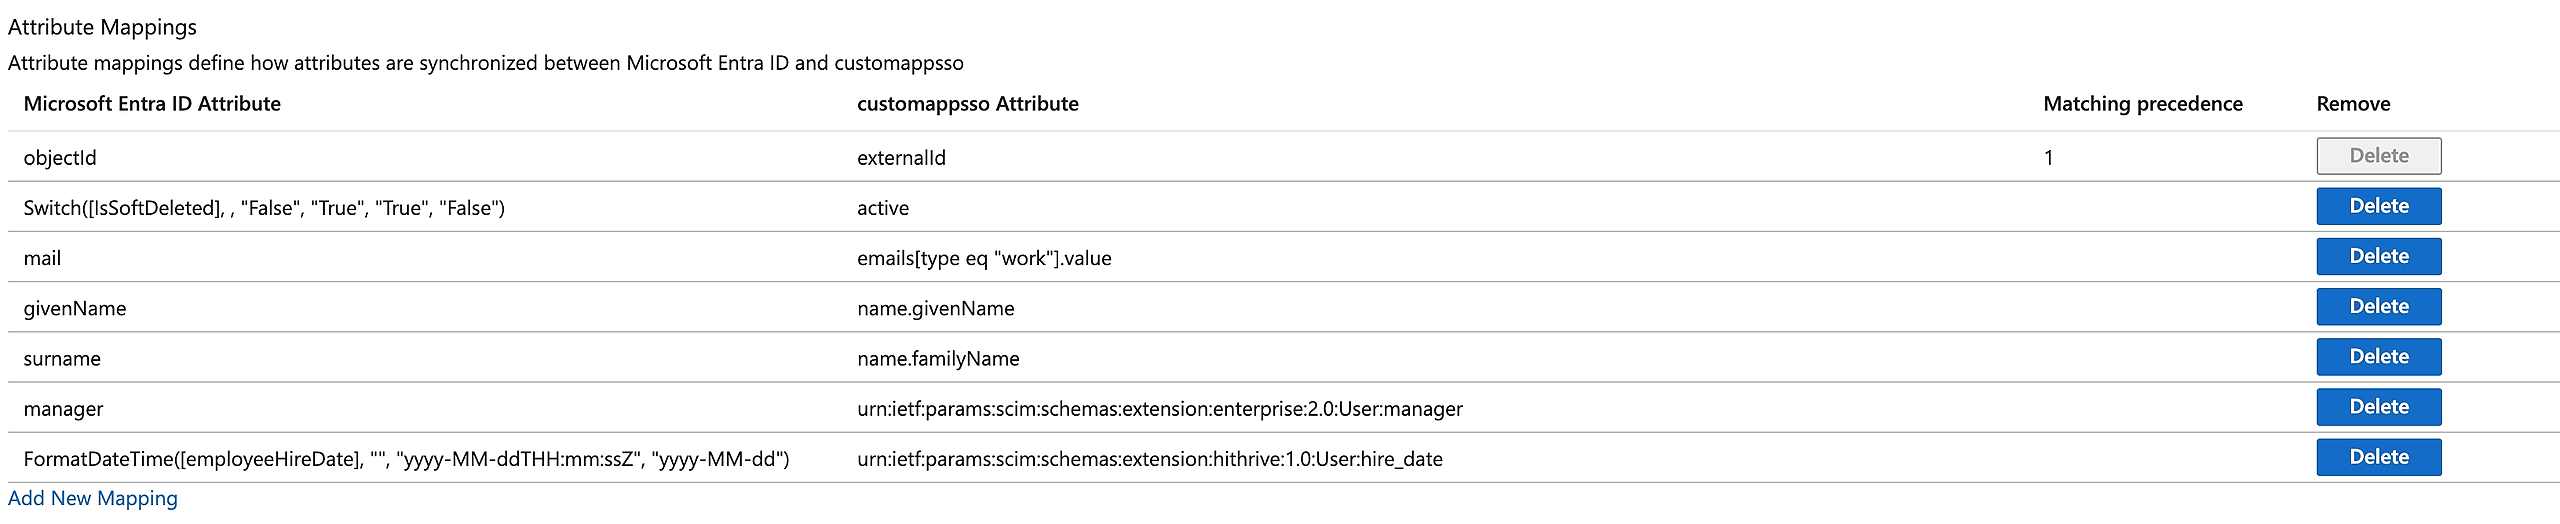
Once all custom target attributes for HiThrive attributes have been created and mapped to Azure AD attributes, click Save.
Enable Provisioning
To start the provisioning of identities from Azure into the custom HiThrive App, follow the steps below.
Navigate back into your custom HiThrive App > go to Provisioning.
Click Start Provisioning.