The Workday integration for HiThrive provides a one-way data sync of employee details from your Workday instance to your HiThrive team. Workday user data is automatically imported on a nightly basis over an encrypted HTTP connection. Only the fields permissioned (and mapped in HiThrive) are accessed – no other employee details are accessed or saved.
What are the benefits of this integration?
Reduced administrative workload
First, this integration reduces the workload for your HiThrive administrators by automating user creation. New users will be automatically populated in HiThrive from Workday. Users can also be deactivated based on data from Workday.
Data consistency
Second, the integration eliminates data inconsistency. Users are updated automatically from Workday, ensuring that your HiThrive data matches your Workday data. This allows your organization to use Workday as a single source of truth for user data.
Improved reporting
With more (and more accurate) user data, your HiThrive reporting and administration is also improved.
Please follow the steps below to enable the integration.
Fields imported from Workday
Birth_Date
Start_Date
Organization
Location
Manager_ID
Position_Title
Employee_ID
First_Name
Last_Name
Department
Title
Synchronization frequency and security
HiThrive automatically imports your Workday user data on a nightly basis over an encrypted HTTP connection. Only the fields listed above are saved to a HiThrive user’s profile – no other employee details are accessed or saved.
Create a Workday Integration System User
Important: Use good security practices for this user. It should only be used for the Workday <> HiThrive integration and leverage a strong password
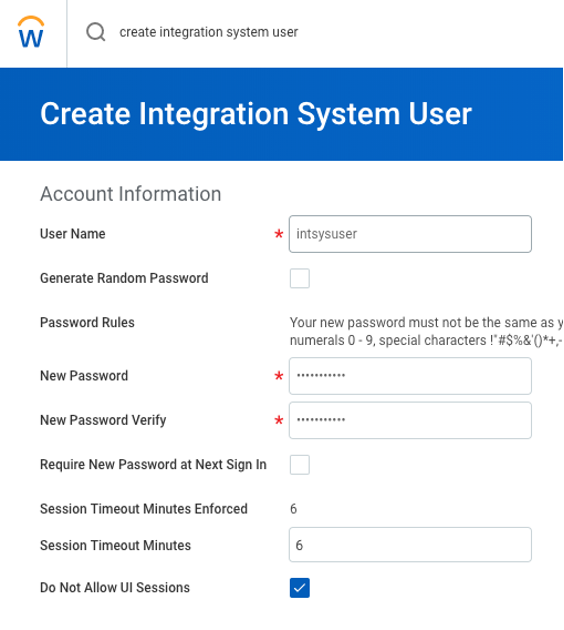
1. Create the user- In Workday, Search: "create integration system user" and select the resulting task
Specify a User Name and a strong password
Set the session timeout to a value as low as possible
Select Do Not Allow UI Sessions
Select OK, then Done
2. Create a Security Group- In Workday:
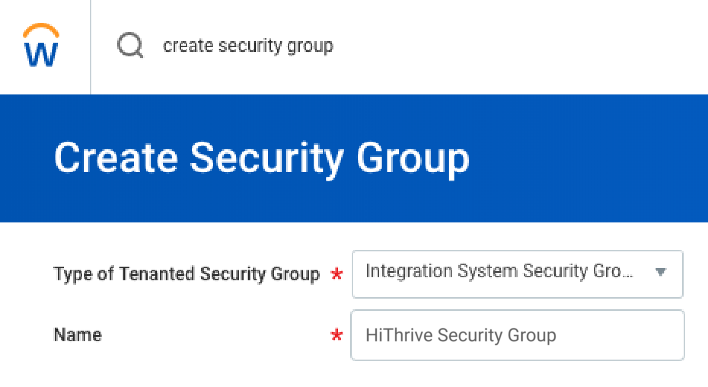
Search: "create security group" and select the resulting task
For Type of Tenanted Security Group, select Integration System Security Group (Unconstrained
Name: HiThrive Security Group
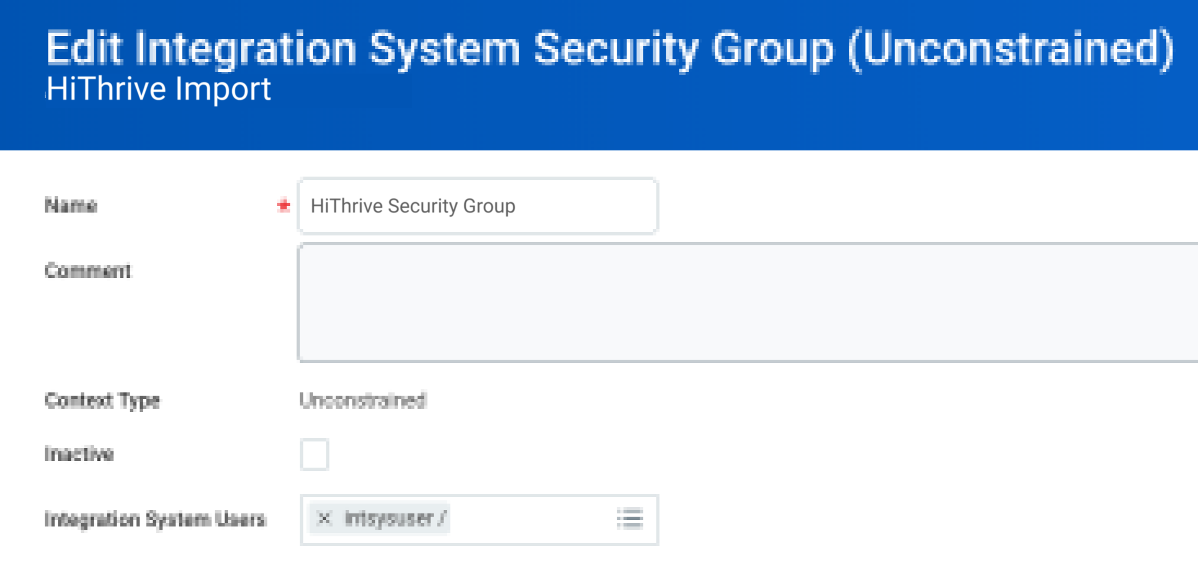
3. Next, for Integration System Users, add the user created in the prior step, select OK, then Done
4. Assign Group to domain Security Configuration - In Workday, perform steps 1-4 for each Domain/Permission pair in the table that follows:
Search:"domain security configuration" and select the result
In the Domain field, search the Domain from the table, select the result, select OK
Select the (...) next to the Domain name; under Actions, select Domain> Edit Security Policy Permissions
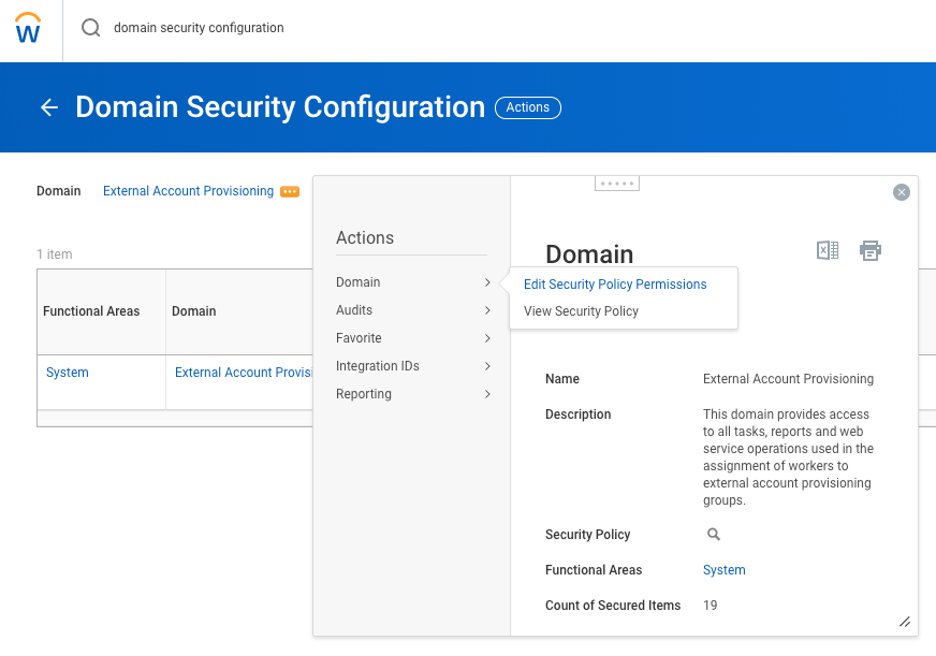
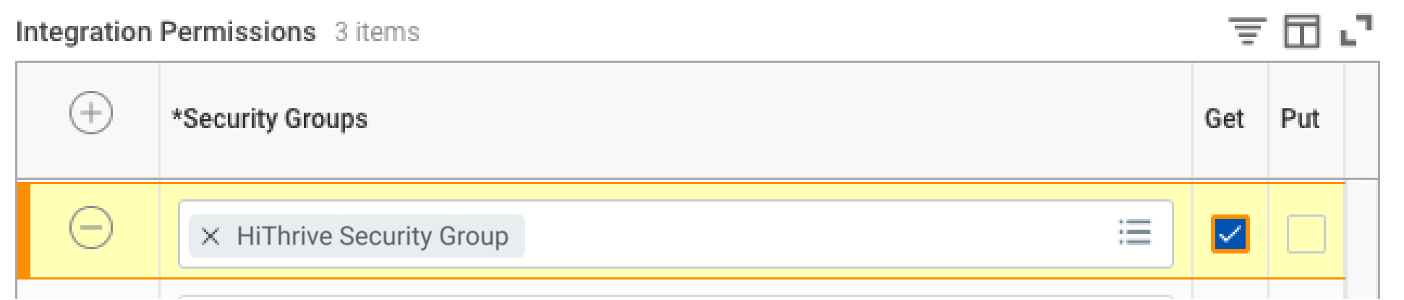
Under Integrated Permissions, add the Security Group created in the above steps and select the Permission
Select OK, then Done. If an alert to Activate Pending Security Policy Changesis displayed, do this after all domains have been updated for the security changes to take effect immediately
Permit the following domain security policies to have “Get” access under Integration Permissions:
DomainPermission
Person Data Work Contact Information
Get
Workday Accounts
Get
Worker Data Active and Terminated Workers
Get
Worker Data All Positions
Get
Worker Data Business Title on Worker Profile
Get
Worker Data Current Staffing Information
Get
Worker Data Public Worker Reports
Get
Worker Data Workers
Get
Search and navigate to the Activate Pending Security Policy Changes page. Click “OK”, then confirm on the following page.
Create Custom Report
Important: Minimize risk by creating a report specifically for importing users to HiThrive including only the attributes that can be utilized by HiThrive
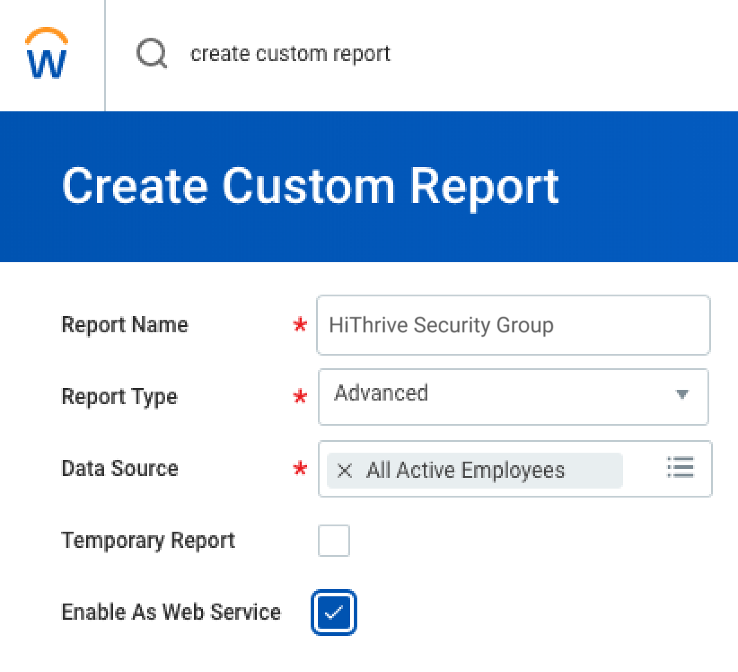
Search: "create custom report" and select the result
Specify:
Report Name: HiThrive User Sync
For Report Type, choose Advanced
Enabled As Web Service: Check this option
Optimized for Performance: Uncheck this option
Data Source: All Active and Terminated Workers
Check Enable As Web Service and select OK
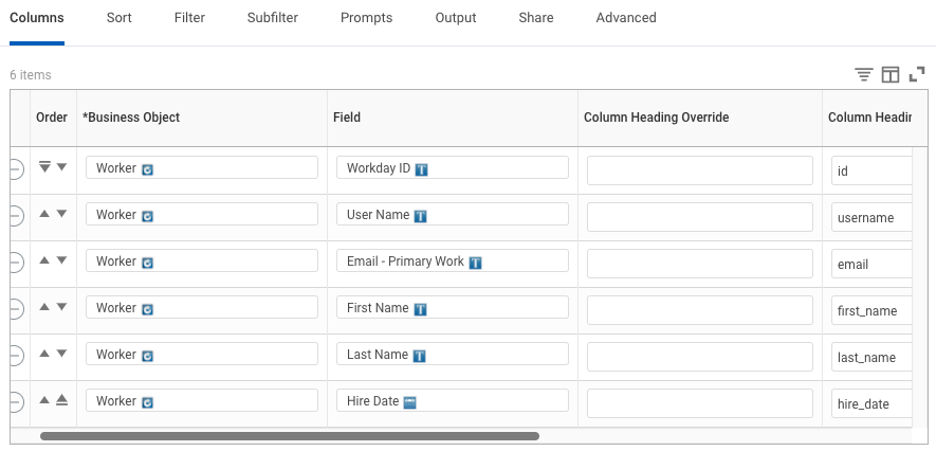
Edit Custom Report : Attributes must be mapped in the Columns tab of the custom report:
Business Object / Field (Your field source may vary) | Column Heading Override XML Alias |
Primary Work Email | workEmail |
Employee ID | employeeId |
Manager ID | managerId |
First Name | firstName |
Last Name | lastName |
Start Date | startDate |
Date of Birth | dateOfBirth |
Location | location |
Department | department |
Organization Name | organization |
Position Title | jobTitle |
Share the report with the integration system user.
Select the Share tab, then Share with specific authorized groups and users.
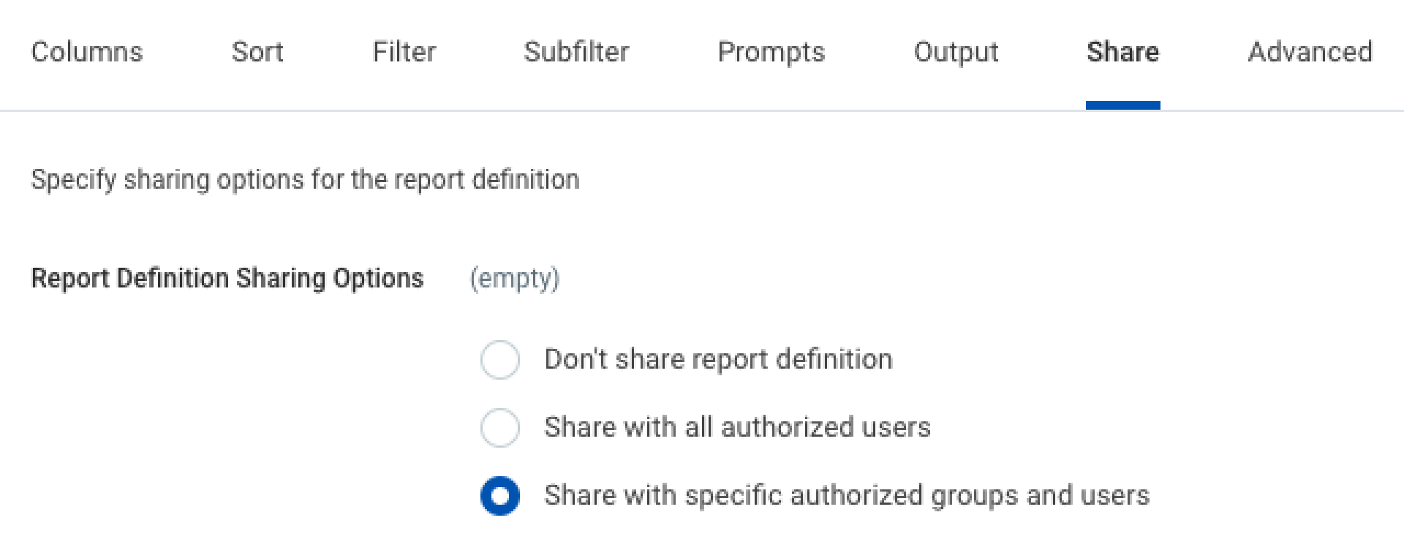
Add an authorized user to the report under the “Share” tab. Search and add the Integration User you created in step one.
Copy your RaaS endpoint. Under the Actions menu, navigate to Web Service > View URLs. Click the “JSON” link to copy the JSON RaaS endpoint URL. You’ll need this for the next step.
Authorize Workday
Provide HiThrive with the credentials for the Integration System User created in the steps above by selecting the Workday integration at https://app.hithrive.com/admin/settings/integrations. (You will need to be assigned as a HiThrive Admin to access the link).
Under the Credentials section, paste your JSON URL, and enter the username and password for the user you created in step one.
Click “Connect to Workday” to connect HiThrive to your Workday report.

Enable the integration and map fields
Once your integration is activated, you will need to map user profile fields to HiThrive.
Enable the integration: toggle the integration to on
Next to Field Mapping, click Edit
Map fields as necessary. At minimum, you must map email address, but you will want to map all fields that apply.
Click Save Fields
You’re all set! We’ll begin syncing within a few hours, and nightly following the initial setup.